It's after the kids have been put to bed. In a few hours this email needs to be sent and I'm just getting started now. I blame a trip to the library and this excellent book. Ironically, I didn't procrastinate on making the croissants at all. They were done before west coast readers were even out of bed on Monday morning.
In order to have fresh made croissants on Monday, I had to make the croissants on Sunday afternoon and evening. As a father of a 3 year old, this means baking with a toddler. A toddler who was convinced more than once that the pointy side the rolling pin was a better tool for gently working with laminated dough... I'm happy to say his moments of insolence had little negative impact on the batch and that this one is the best yet! Not that there aren't problems to solve.
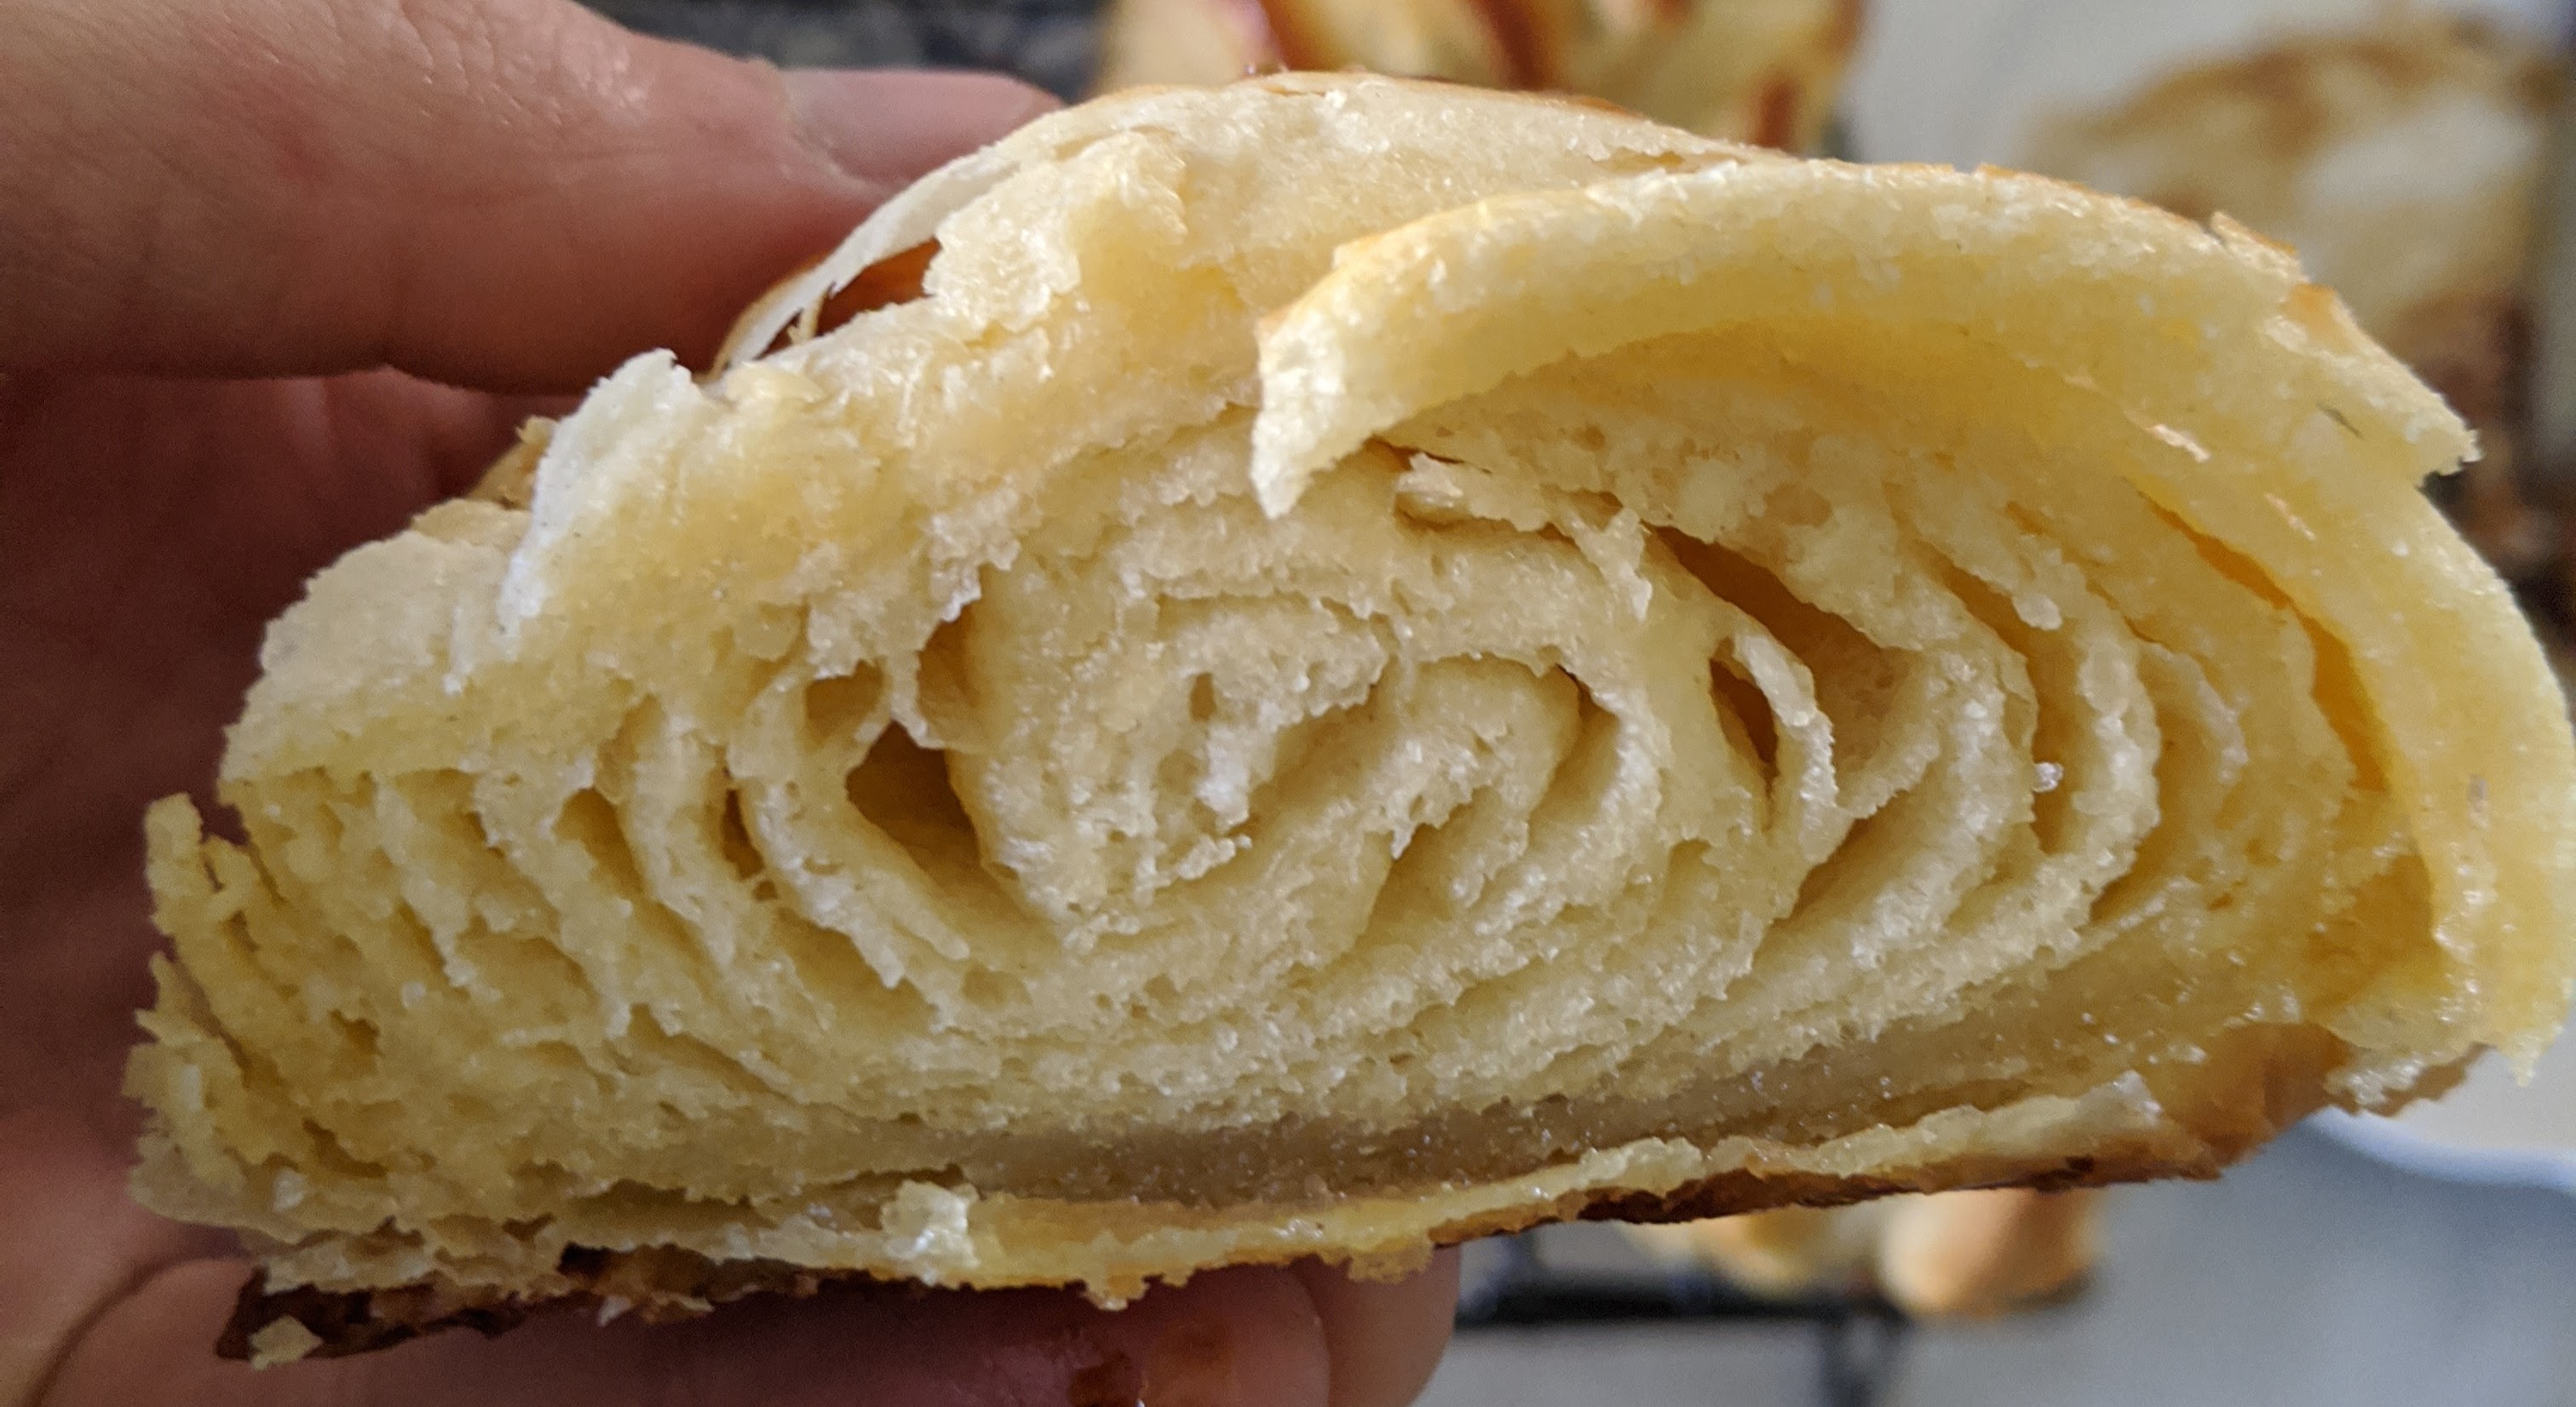
Expert rating: 5 out of 10
Expert review: Still not quite there on the saltiness, butteriness, and flakiness but it was assuredly a croissant.
In reaction to Caitlin's review from last week, I added a bit more salt. To ensure I didn't have the same problems as I had in batch two, I 2x'd the base recipe (rather than 3xing it) and went back to normal all purpose flour. These decisions panned out and I will be sticking with more or less the same recipe for batch 4.
Unsure how proofing hurt batches 1 and 2, I decided to stick with the hot water in the cup method. The raise didn't quite work though, so any tips for how to do this better would be much appreciated.
Like in batch 1, the butter shattered. I'm hoping this guide on how to handle butter when laminating will set me up better for batch 4. I am also going to try using the convection fan on our oven for batch 4. This will let me cook the croissants at a lower temperature by ensuring that the whole oven has a more consistent temperature thanks to air circulation. I'm hoping that this will keep the butter in the croissants a bit more. The bottoms of this week's batch were deep fried in the butter that pooled into the pan, making the bottoms way too hard.
Call for advice
I've had a couple of people suggest ways to improve the croissants and its been really helpful. The idea of using the convection oven I would never have had without a push from a friend. If you have suggestions, please feel free to reply to this email. Only I will get it and it may make the croissant I ask you to eat that much better.
Making the Dough and Butter Blocks
This week I want to talk about the process of making the butter and dough blocks. It's a pretty simple process, but I like it. It's cool to wrap dough in wax paper and let it rest over night! If you don't think that, making croissants from scratch is likely not for you.
I'll start with the dough block and then cover the small difference for the butter block at the end.
Step 1: Cut wax paper to length and tape it together
For this recipe we are making a ten inch square block of dough. To do this I need to cut out a twenty-four inch sheet of wax paper. Doing that with my son was a bit hard, so I ended up with more (which is fine), but twenty-four inches should give you a bit more than a 2 inch over lap when accounting for the height of the dough block.
I needed two of these sheets as the wax paper I have is not wide enough to fold the ends up and so I needed to tape two sheets together to get something big enough.
I figured this technique out in batch 2 when I was making a sixteen inch block of dough and its served me well many times now.
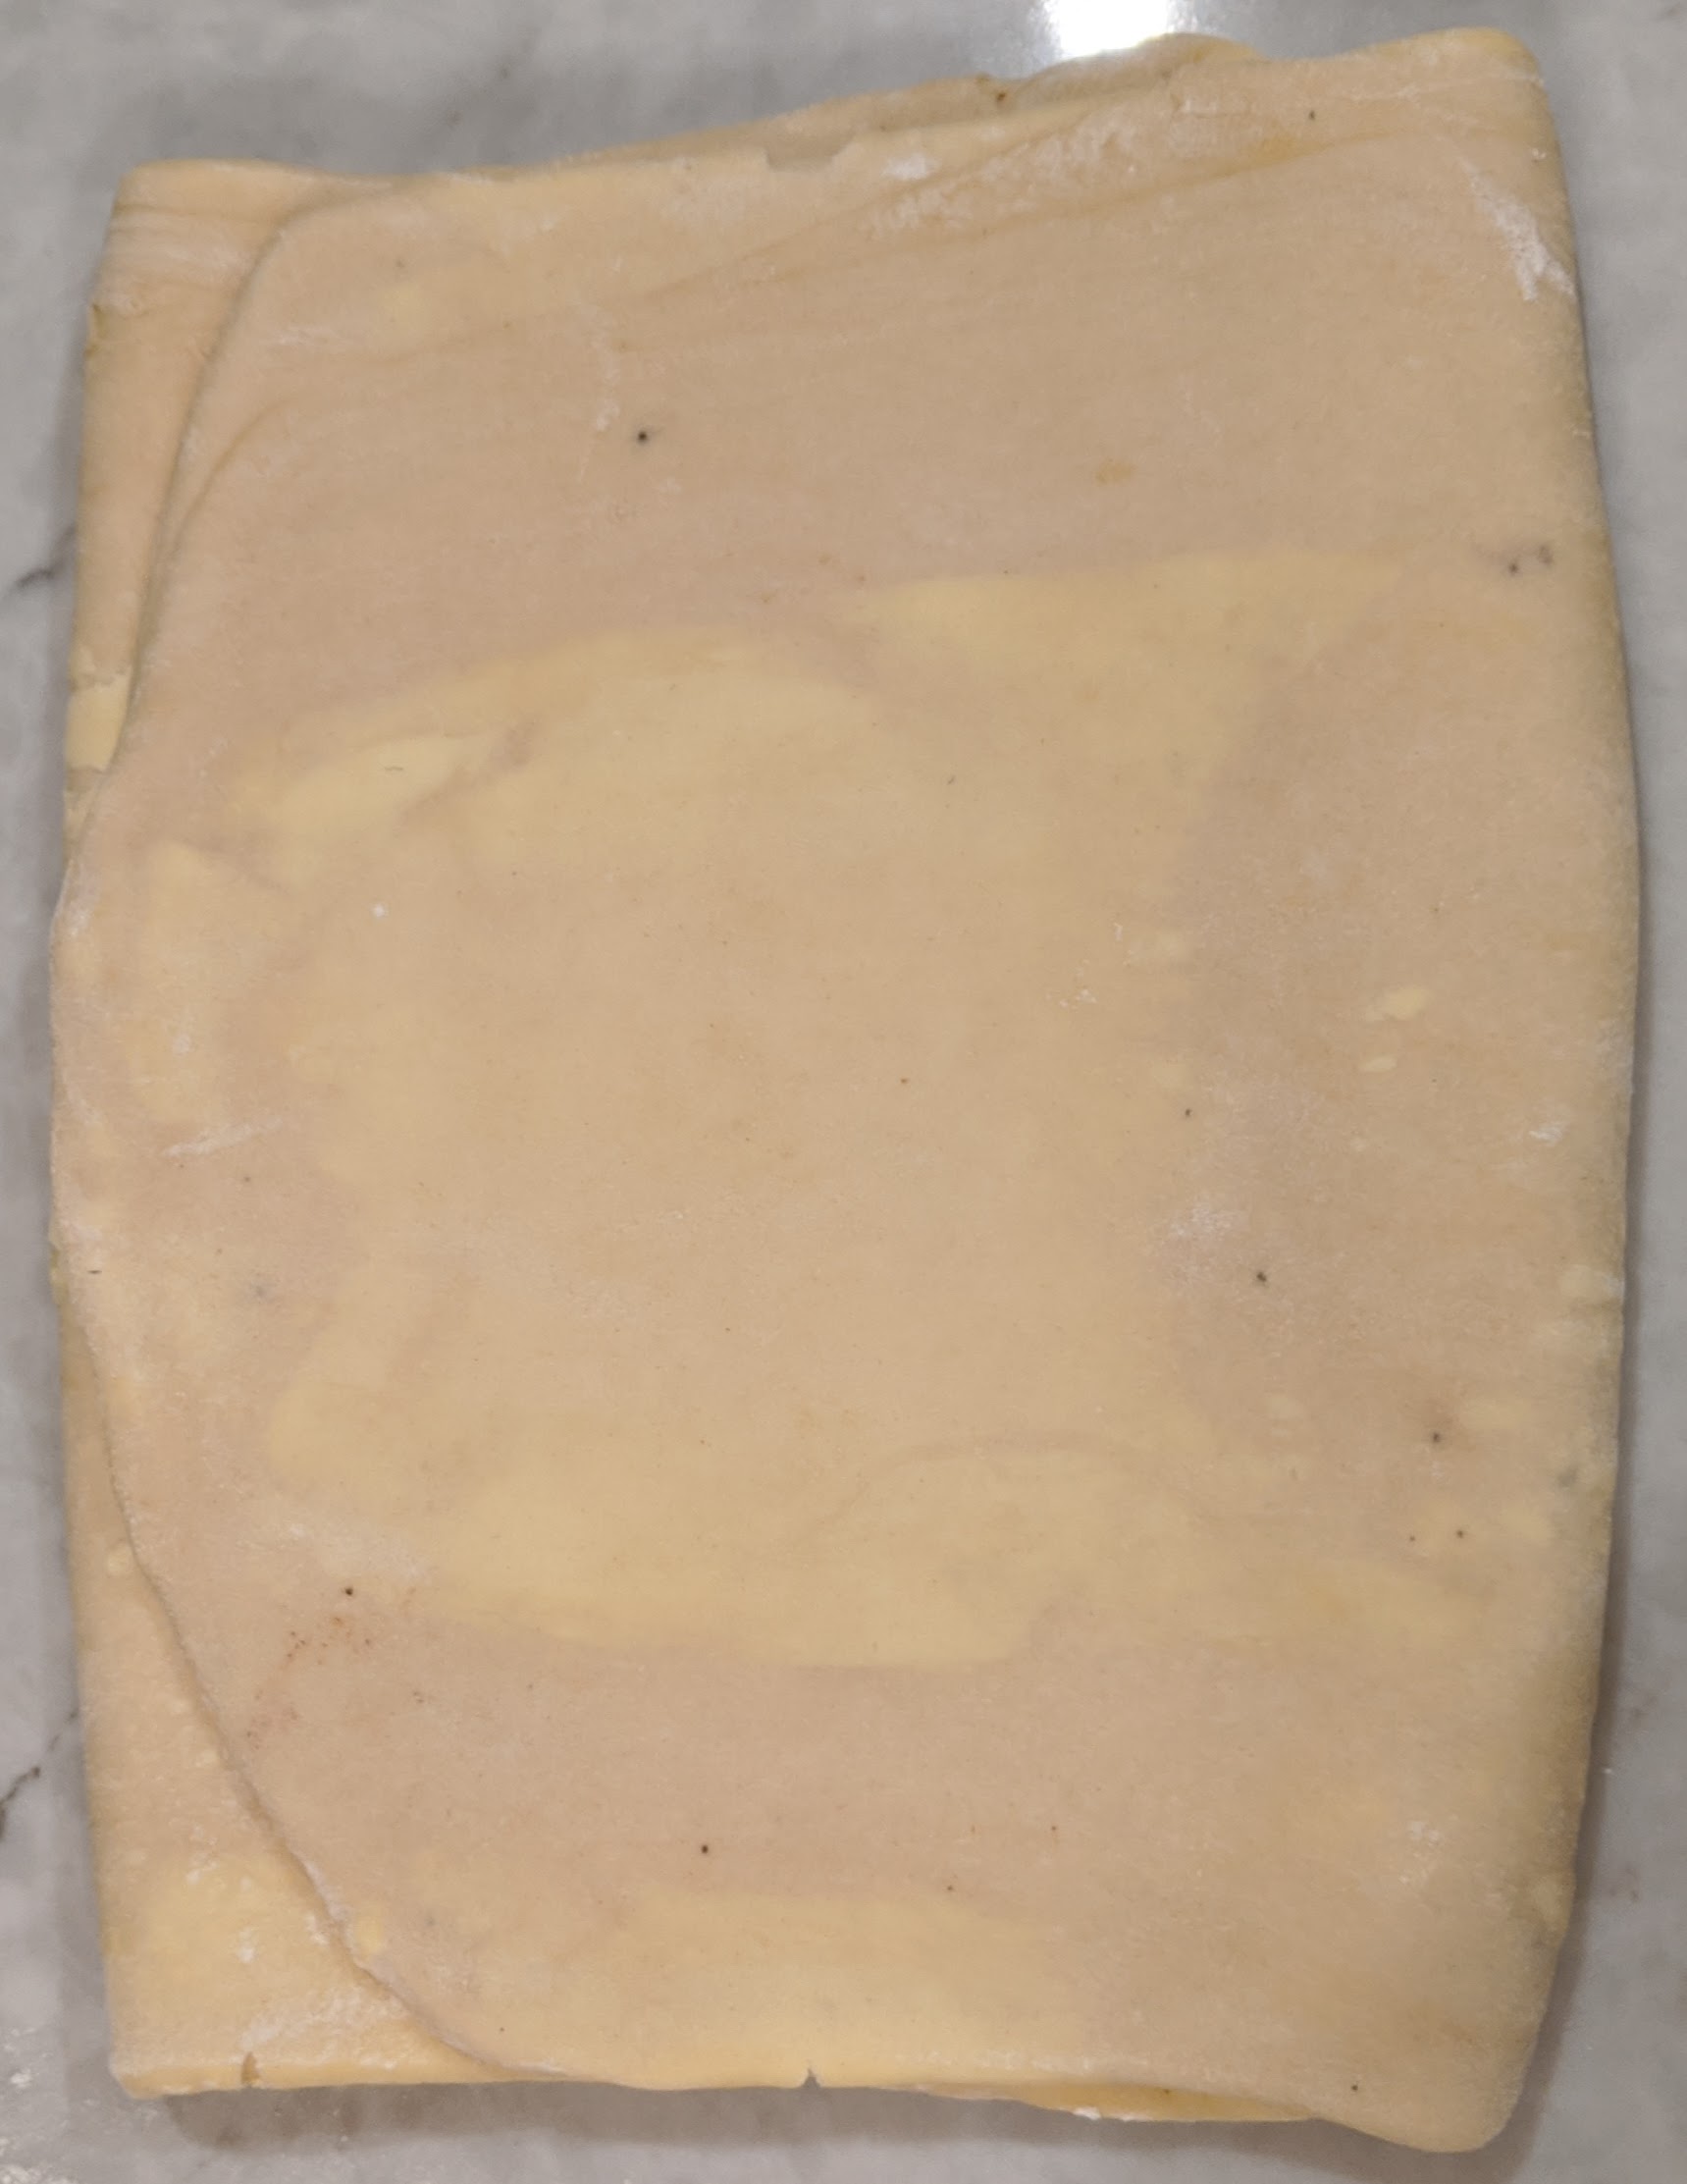
Step 2: Roll the dough out

When rolling the dough out I'm looking to have a 10 inch circle. I do not want to try and roll the dough into a square. That is not what the dough wants to do and I'm setting up a jig to do that for me with this wax paper wrapping job.

You don't want to eye ball guess if it's 10 inches as later you will be wrapping the butter block in this and need the dimensions to be right. But you also don't need them to be perfect. My son kept demanding he was doing a good job holding the ruler while we were rolling and so we ended up with a 9.5 by 10.5 block and it worked out.
Step 3: Wrap it and tape it
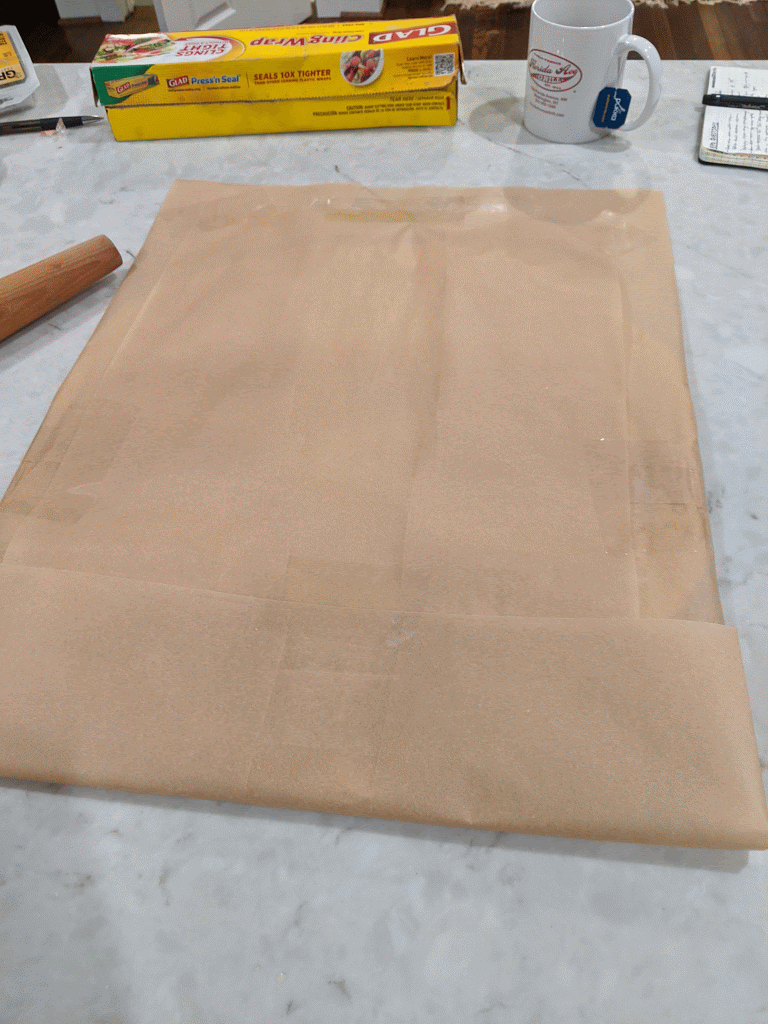
Just like you're giving someone a gift. Fold the paper over and tape it. You really don't need the tape, but moving this around it really helps to have the tape. I did batch 1 without it and had to refold the block multiple times.
Step 4: Roll it into the corners

I mentioned in step two that we are making a jig. Here is where we get to see the jig work. Grab your rolling pin and roll the dough towards the corners of its ten inch bag. Be gentle and watch the dough squeeze into even the smallest tip. This is a real square. No beveled corners. No trimming to make it right. The dough spreads out to fit its container just like water in a glass. We get to use that fact of the world to make our work easier.
As a complete aside, part of what got me wanting to make croissants was a book called "The World Beyond Your Head". In it the author talks about how "jigs" help experts do complicated tasks all the time. So while it would be cool to know how to roll dough into a square with only a rolling pin, the baker in Paris who is making better croissants than you, is most likely using some sort of jig to make this process take less time and less mental effort.
The butter block

The main difference between dough and butter is that butter is hard and dough is soft. This means that with butter you can cut it into small blocks and build out the outline of your square. The advice I'd read online suggests that you keep the butter slices more or less the same width, which has proven a bit hard to do, but stacking the extra butter in places seems to work.
Also, because the butter is hard and broken up, you need to make sure that not just the corners get filled it, but also the holes you left in the middle of the block. To do this, I've been pressing the rolling pin into the butter before rolling to help spread the blocks and fill in those middle gaps.
Ingredients and a quick review in pictures
- 15g sea salt
- 12g active dry yeast
- 2 yolks
- 50g unsalted butter, melted
- 60g cane sugar
- 160g of water @ 100f
- 520g all purpose flour


Thanks for reading. See you next week!
Matthew Chase Whittemore